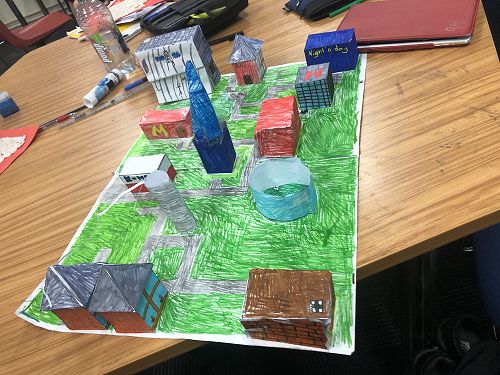
3D Geometric Cities!
In maths we were learning about 2D and 3D shapes. Our first task was to plan out our school using a sheet with 1cm by 1cm squares. We had to use a key to show what our buildings were on our map. Once we were able to complete this, we then got the okay from Miss Bates to plan our Geometric cities in small groups.
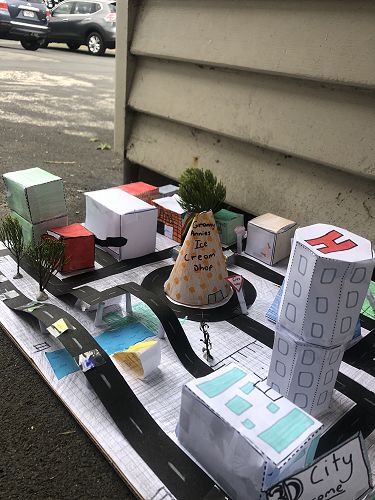
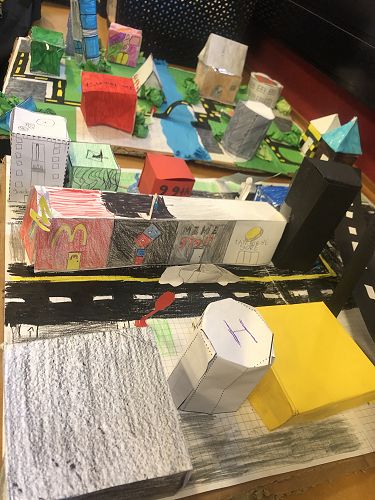
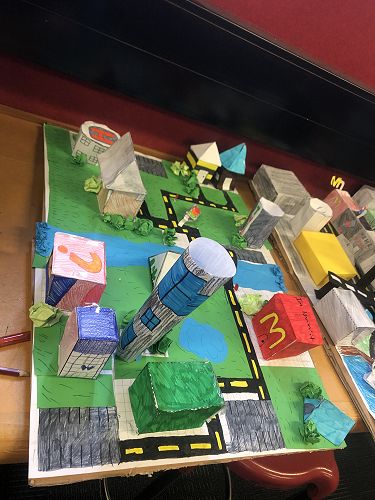
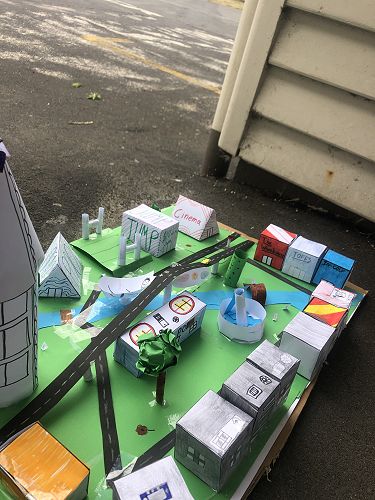
To make a 3D city you had to start with a plan that had 1 cm by 1cm boxes for where you put your places. To copy it to a big plan we had to make it so that one square in the plan was 4 in the 3D town. You couldn't make the buildings too small because the tabs would not work.
Tabs are the little bits on the end of the net that keeps it together.To make the 3D shapes we had to make our own nets using a ruler, a pencil and a piece of paper.
We had two bits of A3 paper with mini squares like the plan so we knew where to put our buildings.
To make the buildings you had to get the measurements right. You then had to cut, colour, fold and stick the nets to make your 3D shape to put in your 3D town.
You could put little decorations for more detail such as a stop sign, roads, rivers, trees, bushes and so much more. For the buildings you could use a variety of shapes like cubes, square based pyramids, cones, prisms and lots of different 3D shapes. But you had to make sure that they were all coloured in and detailed and also to make sure that all your buildings were not the same shape.
All of our cities were all very unique, we really enjoyed this activity.
By Leo and George
Gallery